Pillow Forts are a place of safety and comfort, where imagination is ignited and children can explore creativity. Pillow Fort meets young children in an intelligent, imaginative setting, and gives them the additional tools necessary for play. Each 7-8 minute episode explores new adventures, emotional feelings, and the power of imagination.
Directed and written by Mara McEwin, filmed and edited by John Noel, original music composed by Anthony Rizzo, choreographed by Emily Bunning and animation and puppetry by the ensemble of Treehouse Shakers, our new web-series engages young people safely at home. Each episode will also have a downloadable PDF or video extension of fun art activities connecting directly to each episodic theme that families and students can then create.
Activities
Purchase the Series

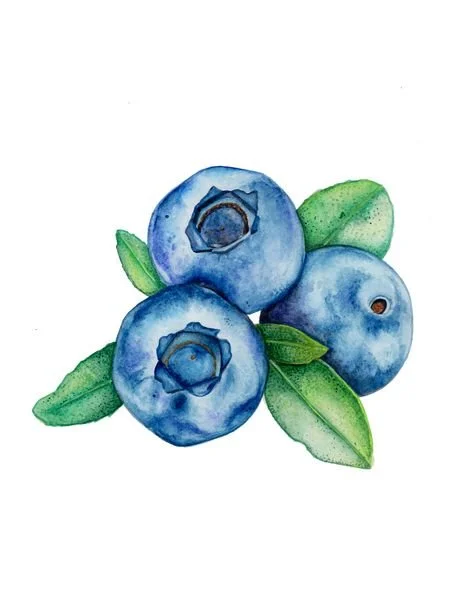
Episode 1 | Blueberry Pie
For ages 3-7 (and their grown-ups!)
In Episode 1, viewers are taken on a special journey to Granny’s House.
Granny has made a blueberry pie for our Pillow Fort Host and her guests.
It is fun to cook with your grown-up.
Try making this amazing Blueberry Pancake recipe. You can even pretend the bluebird brought you these blueberries!
Granny’s Blueberry Pancakes Recipe
Ingredients
3/4 cup milk
2 tablespoons white vinegar
1 cup flour
2 tablespoons sugar
1 teaspoon baking powder
1/2 teaspoon baking soda
1/2 teaspoon salt
1 egg
2 tablespoons melted butter
1+ cup fresh blueberries
more butter for the pan
Mix the milk & vinegar and let it sit for one minute (or two!). Grown-ups, you are making buttermilk.
Whisk dry ingredients together.
Whisk the egg, milk, and melted butter into the dry ingredients until just combined.
Heat a nonstick pan over medium heat. Melt a little smear of butter in the pan.
Pour about 1/3 cup of batter into the hot skillet and spread it flat-like (it will be pretty thick). Arrange a few blueberries on top. Cook until you see little bubbles on top and the edges starting to firm up. Flip and cook for another 1-2 minutes until the pancakes are sky-high fluffy and cooked through.
Serve with butter and maple syrup.
Yummy!
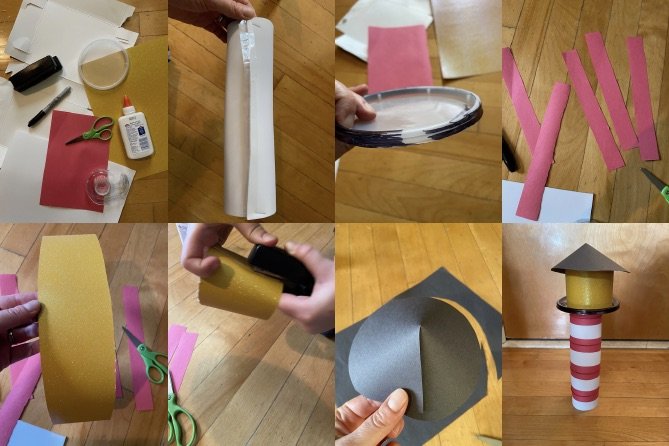
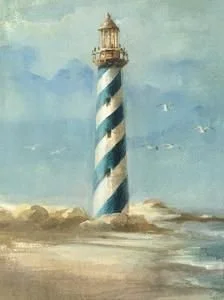
Episode 2 | The Lighthouse: Company is Coming
For ages 3-7 (and their grown-ups!)
Make a Lighthouse!
An easy craft project using a paper towel roll allows children to use their creativity and to better visualize lighthouses.
Materials: Yellow, red, and black paper, Paper towel roll/thick white paper, scissors, tape, glue, stapler, black marker
Make a Lighthouse Out of a paper towel roll or a thick piece of paper or foam mat made into a roll.
Color a plastic lid
Cut red stripes for the lighthouse
Cut a small piece of yellow construction paper and glue it on top of tube. Explain that this yellow paper represents the light. The “light” can be as simple as a piece of paper cut or torn unevenly or it can be cut in more complex geometrical shapes. This end will be the top of the lighthouse.
Make into a roll by connecting the two sides.
Cut a circle and then make a slit to create a roof
Show examples of solid colored light houses and ones with patterns. Can also allow the viewer children to use their imaginations to come up with their own patterns and designs. However, if a more uniform lighthouse pattern is desired, show the children specific patterns and limit their choice of paper colours and shapes.
Learn about Lighthouse Codes
Learn about lighthouse codes, or have a print out of the lighthouse codes.
Every lighthouse emits a distinctive series of flashes known as its “characteristic.” These flash sequences allow ship captains to time intervals between flashes so that they can identify lighthouses, using a publication called the Light List. This publication assigns a number to each lighted beacon and describes its identifying characteristics. Flash sequences include the following: fixed, occulting, flashing, isophase, group flashing, alternating, and Morse code.
A fixed light is a light that shines continuously. An occulting light has longer periods of light than of darkness, while a flashing light has longer periods of darkness than of light. An isophase light has equal durations of light and darkness. A group flashing light has a specified number of regularly repeating flashes of light, while an alternating light shows light of different colors. Morse code shows short and long flashes that represent dots and dashes, respectively. These dots and dashes are grouped to represent code characters.
Foghorns & Radio Signals
Many lighthouses are equipped with a horn to help guide ships sailing in foggy weather. These foghorns, which make their sound by quickly releasing compressed air, can be heard for distances of up to 13 km (8 mi). Ship captains can determine their position by identifying distinctive combinations of long and short horn blasts specific to each lighthouse.
Some lighthouses are also equipped with radio beacons that transmit Morse code radio signals. These radio signals, which are distinguished by short (dot) and long (dash) combinations, have a range of up to 320 km (200 mi).
Episode 3 | Outer Space: Making Friends
For ages 3-7 (and their grown-ups!)
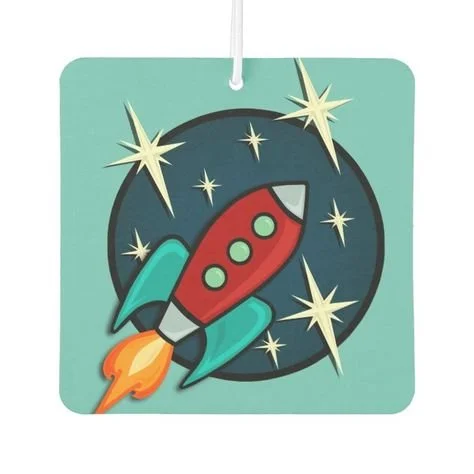
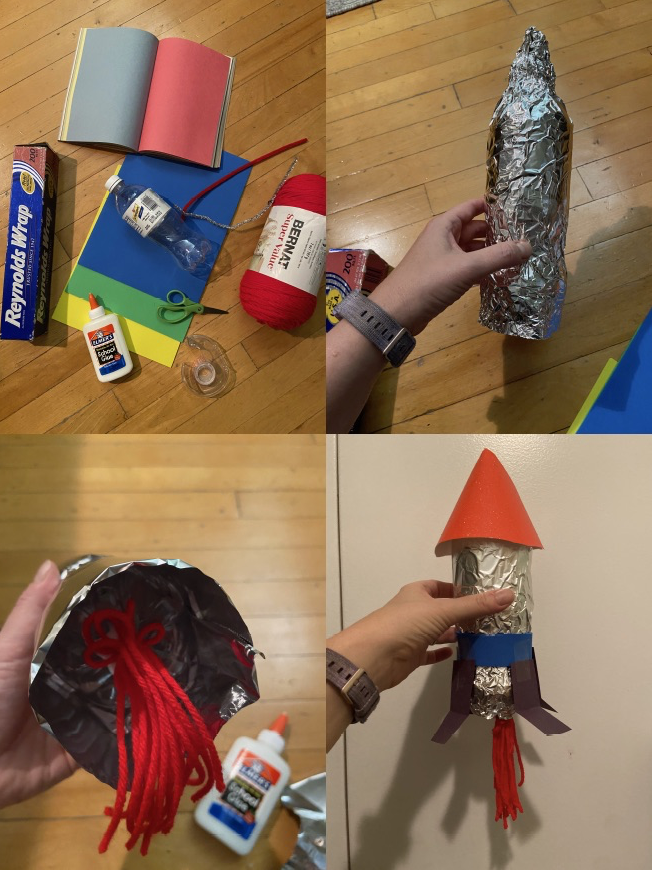
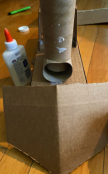
Make a Rocket Ship!
Materials: Plastic bottle, foil, string, colored paper, scissors, tape, glue
Wrap the bottle in tin foil to create the body of the rocket
Glue some string to the bottom of the plastic bottle to create the flame and
then close the foil at the bottom to reinforce.Add a nose cone tip, fins, and any details to make the rocket ship your own.
Make Asteroid Pancakes With Your Grown-Up
In Episode 3, the space creature gives the host some delicious asteroid pancakes. Try making these mini pancakes with your grown-up. When you are eating your pancakes, pretend they taste like different foods too!
Ingredients
1 1/2 cups all-purpose flour
3 teaspoons baking powder
1 teaspoon salt
1 1/4 cups milk (whole)
1 egg
3 tablespoons butter (melted)
Add a teaspoon of vanilla or cinnamon for some flavorful variations
Mix: In a bowl, sift the dry ingredients and combine. Then, make a well at the center where you will put the wet ingredients in. Then, whisk everything until fully incorporated.
Cook: Heat a non-stick pan or griddle. Put in scoops of the batter. Cook until each one turns brown then flip to cook the other side.
Serve: Garnish with your favorite fruits.

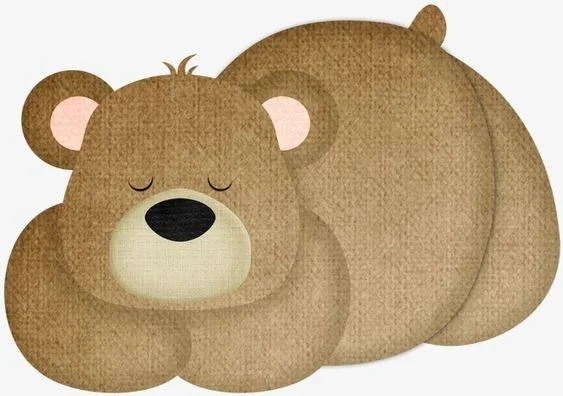
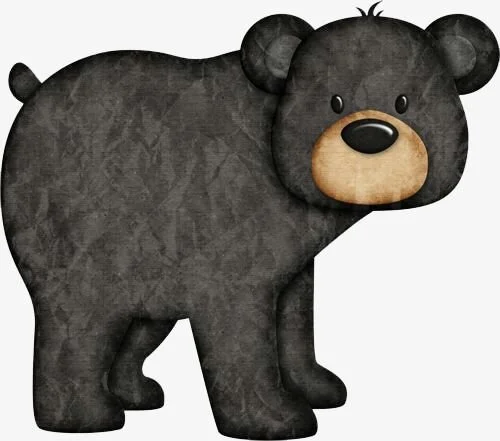
Episode 4 | Hibernation
For ages 3-7 (and their grown-ups!)
In Episode 4 of Pillow Fort, audiences are taken to a bear’s cave, where they discover a bear and her cub, sleeping.
Hibernation Definition for Young People
Hibernation is a way that some animals deal with the harsh winter. The animals curl up in a safe place and stay there until winter ends. Hibernating animals barely breathe, and their body temperature is near the freezing mark. In warmer weather they return to their regular activities.
Creative Play
After watching Pillow Fort, Episode 4, turn the pillows from your sofa into a Bear’s cave. Then, have your young people pretend to be bears who are sleeping, they can also bring in a favorite teddy bear. Play some classical music, and you can also have them play “Pillow Fort: Hibernation.”
Craft Project
Make a fun sleeping bear craft on a large paper plate.
What You Will Need:
Scissors
Glue
Brown & Black Construction Paper
Markers or Crayons
Cotton Balls
Cut out bear ears, sleeping eyes (two black strips of construction paper), a very big bear nose and then glue them to the plate.
Place cotton balls all around the sleeping face to make the bear “cozy” in his cave. Once your project has dried, display in your favorite spot!
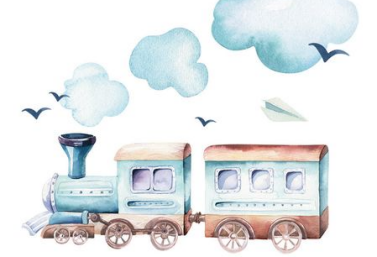
Episode 5 | The Train Ride
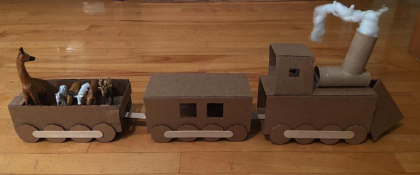
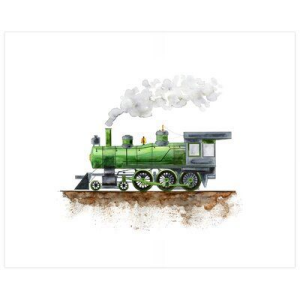
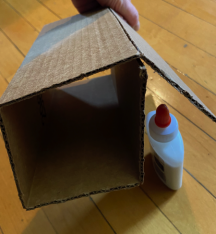
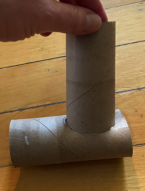
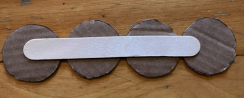
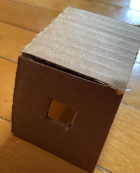
In Episode 5 of Pillow Fort, audiences are taken on a train ride where they learn all about many different types of trains. There is also a cardboard train used in the episode. Below, we have given you the directions on how to make this train with your grown up (Parents, there are a few sharp objects that are needed to make this next craft project.)
Craft Project
How to Make a Cardboard Train
What You Will Need:
Cardboard
2 toilet paper rolls
Cotton ball
Pipe cleaner
2 Popsicle sticks
Glue
Markers
Tape
Scissors
Scoring knife
**Practice Safety** when cutting. Keep those fingers out of the way and away from yourself, not towards your body.
1. Gather Materials (List Above)
To help you make bends in cardboard, score one side of the cardboard by cutting only part way through. To make the train cars, score the cardboard in 4 places, and then bend into a box shape and glue the flap down.
Cut a hole in the long side of the toilet paper roll and fit the second roll into it.
Attach a pipe cleaner to the inside of the chimney and then stretch a cotton ball around it to create the steam.
Cut 8 circles and attached 4 to each popsicle stick to create the coupling rod and wheels
Make the conductor room by scoring the cardboard in 2 places and folding. Carefully cut squares in the side edges for windows.
Cut a folded triangle piece to create the cowcatcher.
Attach all the parts to the body of the train with glue and tape.
Once you are finished making your train, you can add some animals or people and recreate the Train Ride from Pillow Fort, or make up your own train ride adventure!


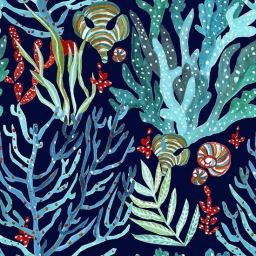
Episode 6: Underwater Sea
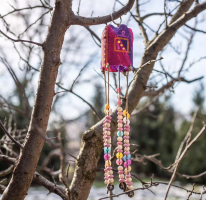
In Episode 6 of Pillow Fort, audiences are taken on an underwater sea adventure, where they meet a Sea Sprite and learn all about her coral reef home. They also find out how they can help save her coral reef by using less plastic. The best way to protect our sea environment is to give up single use items, especially water bottles. If you do have to use one, before throwing it in the recycling bin, you can upcycle your water bottle. Below is a favorite upcycling idea.
Together, with your grown-up, make a colorful wind chime out of a used water bottle.
**Practice Safety** when cutting, or creating a hole in the bottle, leave this step for a grownup. Always keep those fingers out of the way and away from yourself, not towards your body.
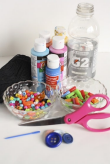
What You Will Need:
(Don’t buy anything for this project. Be creative with things you already have at home.)
Water bottle (or another plastic bottle)
Acrylic Paint
Paint Brush
Yarn, string or fishing line
Beads
Cut up drinking straws
Plastic buttons (Large)
Metal key ring (optional)
Hole Punch
Gather your materials and then cut off the tapered, top portion of the plastic bottle.
Paint each section of the bottle a favorite color.
When the paint is dry, punch evenly-spaced holes around the bottom of the bottle. This part is for your chimes, you could do anywhere from 4-8 holes.
Thread your beads on a string to make your wind chime. Use one heavier bead to help give some weight to the chime.
For the inner chime,thread a button (with a hook on the back) onto a long length of yarn. Double the yarn back, thread both ends through a needle, and fill the length of yarn with sections of straws and colored beads.
Leave a few inches of space at the top of each strand of yarn. Slip one through a punched hole, and knot it into place.
Next attach the center chime by making a hole in the top of the bottle. Parents, either you can drill a small hole, or use a small screwdriver until it pokes a hole. Poke the yarn for the center chime through the hole.
You will need a stopper on the inside and outside of the bottle to prevent the middle chime from going through the hole. You can knit the yarn a couple of inches down from the top.
Then thread the yarn through the hole, and slip it through a pony bead, knot the bead in place, and tie a loop for hanging.
You can hang your wind chime using this loop, or add a metal key ring.
Enjoy your new handmade wind chime!

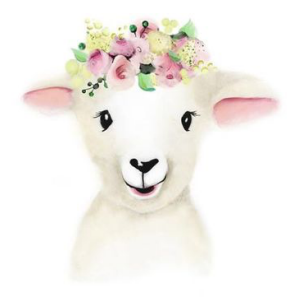
Episode 7 | Lost Lamb
In Episode 7 of Pillow Fort, audiences are taken on a journey as they help Mary find her lost lamb, Millie. During the episode a few references to some favorite nursery rhymes are also made.
Nursery Rhyme Creative Movement
After watching Pillow Fort, Episode 7, try recreating the Candlestick Dance that the Pillow Fort Host does. You can add some of your own fun moves as well, as you pretend to hop over the candlestick.
Open Play
Parents have your child create a farm, using wooden blocks, and if you have farm animals and people even better. And then have your child recreate the Mary Had A Little Lamb poem using their imagination and an open concept of play.
Craft Project
Make a fun lamb craft on a large paper plate.
What You Will Need:
Scissors
Glue
Cotton Balls
Markers or Crayons
Cut out lamb ears, eyes, a very lamb’s nose and then glue them to the plate. Glue the ears at the top of the plate to make them a bit more floppy.
Place cotton balls all around the face to make the lamb look and feel fluffy. You can also reference with your artist that the lamb’s fleece was as white as snow. Once your project has dried, display in your favorite spot!

Episode 8 | The Baker
In Episode 8 of Pillow Fort, audiences are taken on a journey as they help a French Baker create her cake for the Queen.
Make a Baker’s Hat Craft Project
After watching Pillow Fort, Episode 8, you can make your very own baker’s hat, to play your own version of The Baker.
What You Will Need:
White tissue paper
Stapler
Tape
White card stock
Scissors or paper cutter
Directions:
Cut 2 pieces of card stock, lengthwise, into strips 3 inches wide.
Then, staple the strips together to form one long strip of paper. The strip of paper should be approximately 18 to 20 inches long.
Take a sheet of tissue paper and slowly bunch it along the top edge of the card stock, taping it to the strip as you go.
When you get to the end of your first piece of tissue paper, bend the long strip of card stock into a circle. Staple the ends together at the top and bottom.
Continue to bunch up the tissue paper, taping it to the inside of the card stock circle until you have made it all the way around.
Affix a few pieces of tape inside the hat to hold any gaps in the tissue paper together.
Puff the tissue top and start baking your favorite Soufflé.


Bake With Your Grown Up.
This recipe is a little harder than our recipes in the past, so be sure to have your grown-up with you.
Meyer Lemon Soufflé
By Paula Dean
Makes 6 to 8 servings
Ingredients
2 tablespoons unsalted butter, melted
3⁄4 cup granulated sugar, divided
41⁄2 tablespoons all-purpose flour
1⁄8 teaspoon kosher salt
11⁄4 cups whole milk, divided
4 large eggs, separated
1 teaspoon packed Meyer lemon zest
3 tablespoons fresh Meyer lemon juice
1 tablespoon unsalted butter
1⁄4 teaspoon cream of tartar
Garnish: confectioners’ sugar
Instructions
Preheat oven to 350°. Using upward strokes, brush bottom and sides of a 11⁄2-quart soufflé dish with melted butter. Add 1⁄4 cup granulated sugar, swirling dish to fully coat bottom and sides. Gently shake out excess sugar.
In a medium bowl, whisk together flour, 1⁄4 cup granulated sugar, and salt; whisk in 1⁄4 cup milk and egg yolks until smooth.
In a medium saucepan, heat remaining 1 cup milk over medium heat just until bubbles form around sides of pan. (Do not boil.) Gradually whisk half of hot milk into flour mixture until smooth. Whisk flour mixture into remaining hot milk in pan. Cook over medium heat, whisking constantly, until thickened and bubbly. Remove from heat; whisk in lemon zest and juice and butter until butter is melted. Pour into a medium bowl; let cool for 5 minutes, stirring twice.
In a large bowl, beat egg whites and cream of tartar with a mixer at medium speed until soft peaks form. With mixer on high speed, add remaining 1⁄4 cup granulated sugar, 1 tablespoon at a time, beating just until stiff peaks form.
Gently whisk 1 cup egg white mixture into custard mixture just until combined. Gently fold remaining egg white mixture into custard mixture. Gently spoon batter into prepared pan.
Bake until golden brown and soufflé has puffed about 2 inches above rim of pan, 30 to 35 minutes, watching carefully toward the end. Serve immediately. Garnish with confectioners’ sugar, if desired.
Notes: Separate the eggs while cold, but beat the egg whites after they’ve come to room temperature. Watch the soufflé carefully; the higher it rises past 2 inches above the rim, the more likely it is to overflow out of the dish.

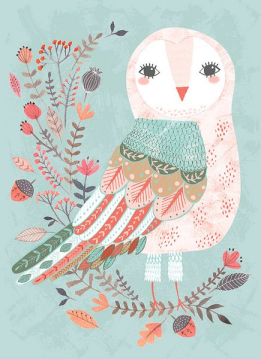
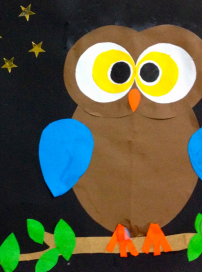
Episode 9 | The Owl
In Episode 9 of Pillow Fort, our host meets an owl and learns all about being nocturnal and diurnal. After the episode, have your young person create an owl of their own, and talk with them about how Owls are nocturnal, and we are diurnal.
Make a Nighttime Owl Craft Project
Make a fun owl craft.
What You Will Need:
Black construction paper
Various colored construction paper
Gold/Silver star stickers
Gold/Silver marker (if you don’t have stickers)
Scissors
Glue
Pencil
Depending on the age of your child, you can help cut out some of these shapes. For five and up, let them do the cutting to help improve their scissor skills. To get started, draw and cut out the following shapes. We put the measurements, but you can also just do these shapes to their approximate sizes. Also, your owl can be any color, your child may want to make them, so just adjust the colors below.
Face: 2 brown circles of diameter 8.5 cm Moon: 1 yellow circle of diameter 8.5 cm Face: 2 white circles of diameter 6 cm
Eyes: 2 white circles of 2.5 cm, 2 black circles of 2 cm
Eyes: 2 amber/dark yellow circles of diameter 4.2 cm
Beak: 1 longish tear-drop shape with length 2.5 cm and width, 1.3 cm
Body: 1 brown roundish tear-drop shape with length 15cm and width 13 cm (body) Wings: 2 blue (or any color) tear-drop shape with length 8.5 cm and width 5 cm Claws: 6 3.8 cm x 0.5cm orange rectangles (claws)
Leaves & Branches: At least 7-8 green leaf shapes of various sizes
A branch shape of at least 25 cm (You can also join the paper together to make it long enough)
Glue the shapes into place. If you don’t have the gold or silver stickers, use a gold or silver metallic marker to draw the stars. And Voila! You have a nighttime owl.